Facebook is arguably one of the most popular social media platforms out there. If you don’t have a presence on this platform, you could be missing out on opportunities to connect with your audience. As someone who works with companies all across the United States managing their social media accounts, one of the first items on our checklist is to make sure our client has a social media account.
That’s why a Facebook Business Manager is a must-have for any business. This tool will help you increase visibility and get the recognition your brand deserves on Facebook.
Not sure where to start? Don’t worry. That’s why we put together a step-by-step guide on how to set up a Facebook business account.
Let’s dive in.
What is a Facebook business account?
A Facebook business account is exactly what it sounds like: an account for your business! Your Facebook Business Manager is where you’ll manage everything attached to your business on Facebook.
Facebook also has a massive suite of tools and resources businesses can utilize to enhance their marketing efforts and improve their business. You can open up your own shop and sell products, run ads to reach a larger audience, and even post about future events you have planned. The best part is: Everything is managed in one place.
Within your Facebook business account, you’ll be able to manage the following:
- Facebook Business Page: is an extension of your website and should be treated like one! By setting up your own Facebook business page, you’ll be able to grow your business through social media by keeping customers informed and connected with your brand.
- Facebook Ad Account: is where you’ll be able to run ads, keep your data organized, and reach a larger audience.
- Facebook Commerce Manager: is where you can connect your Shopify account and utilize Facebook as an extension of your shop. You’re able to direct users back to your website or complete purchases all within Facebook.
Why use Facebook for business?
Facebook is more than just a social media platform. Sure, that’s a big part of it! However, there is so much more than what meets the eye.
Setting up a Facebook business account for your business is a great way to gain brand visibility, expand your reach, and get noticed by potential prospects. It’s a tool you can utilize to share content that aligns with your brand’s tone and voice so you can sell your services and products.
Once you have an account set up for yourself, you’ll have a range of new opportunities for your business you can take advantage of.
Ready to get started? Here’s how to set up a Facebook business account.
How to set up a Facebook business account
1. Create your account
To get started, go to business.Facebook.com and click create account in the top right-hand corner. You’ll need to enter your business name, personal name, and a business email address, and then click next in the bottom right-hand corner.
Next, you’ll be prompted to fill out all of your business details. These include address, phone number, and website. Facebook will ask how you plan to use your Facebook business manager: promote your own goods or services or provide services to other businesses.
Once you click submit, you’ll need to go back to your business email. The Facebook business manager will send you an email with a subject line that says “Confirm your business email.” Click confirm now.
2. Facebook Business Page
There are a few ways to go about the next step. If your business already has an existing Facebook business page, this is when you’ll connect the page to the Facebook Business Manager. If you freelance or are an agency, you’ll need someone at the company that has one, but if you don’t own the page, you’ll need to click the request access button.
If your company already has a Facebook business page, make sure you’re always requesting access at this step. If you click the add page, you’ll have limited access to the business assets, and you’ll save yourself a headache later on.
If you’re managing your own company’s page, it should be relatively straightforward.
If you don’t have a Facebook business page set up just yet, go to Facebook Business Manager dashboard, click the add page option, from there click the create page button.
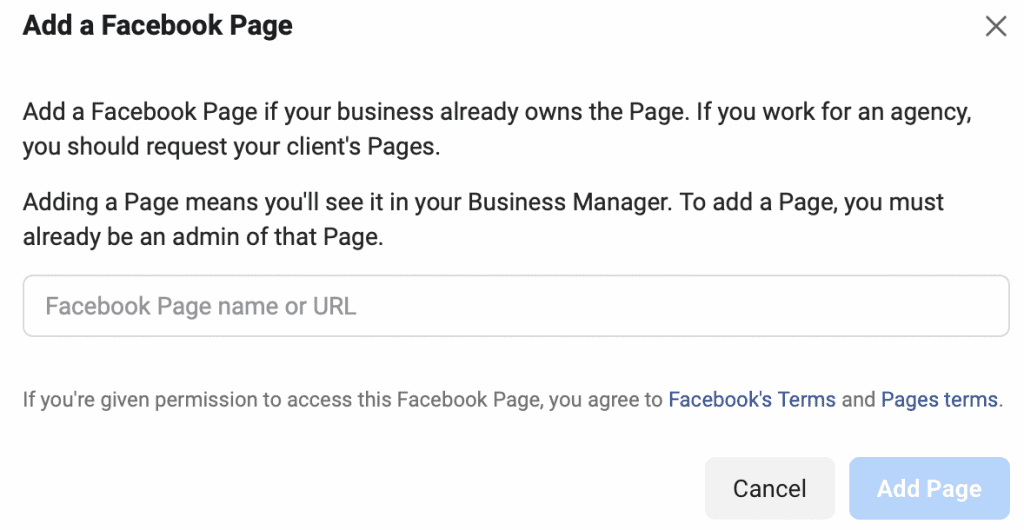
If you already have a Facebook business page, you’ll want to click the add page if you have administrator access. Type in the name of your business or URL, and the page should auto-populate. When it does, click the add page in the right-hand corner.
If you add more than one Facebook page, you’ll need to repeat the following steps.
3. Add your ad account
If you already have a Facebook Ad account set up and want to link the Facebook Business Manager, you’ll need to do the following:
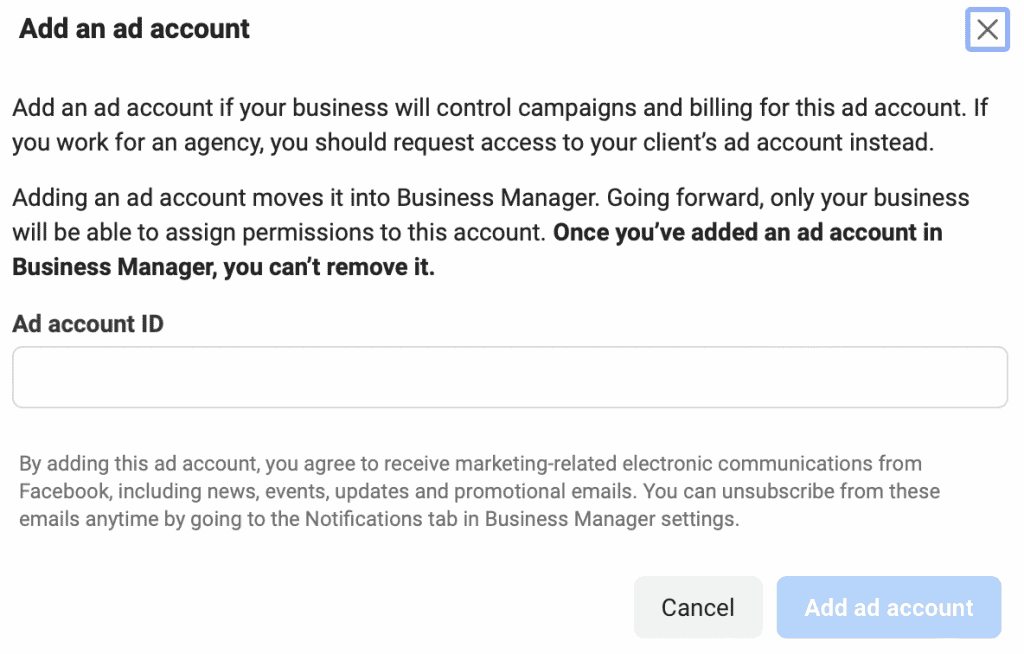
Start at the Business Manager dashboard, click add ad account, then enter your account ID associated with your ad account. If you don’t know your ID, you can find it within the ad account. It’s usually written on the top left-hand corner above the ad dashboard.
If you don’t have an additional account set up, you’ll want to do the following:
- Start at the Business Manager dashboard, click add ad account, then click create an ad account.
- Name your ad account, add a time zone and the currency you wish to be charged in, and click next.
- Answer who the account will be for my business or another business or client, and click create.
It’s important to keep in mind that once you add your add account to your Facebook Business Manager, it can’t be removed. If you’re looking to request a client or a business you work for an ad account, click the request access.
4. Invite the team
Once you have your business page and ad account attached to the Facebook Business Manager, you’re halfway there! Next, you’ll want to invite any of your team members that need access to your Facebook Business Manager.
Start at the Business Manager dashboard, and click add people.
Enter your team member’s business email. This isn’t the moment where you’ll invite an agency or a different business. We’ll get into that later.
Decide what type of access the individual will have by assigning them a business role.
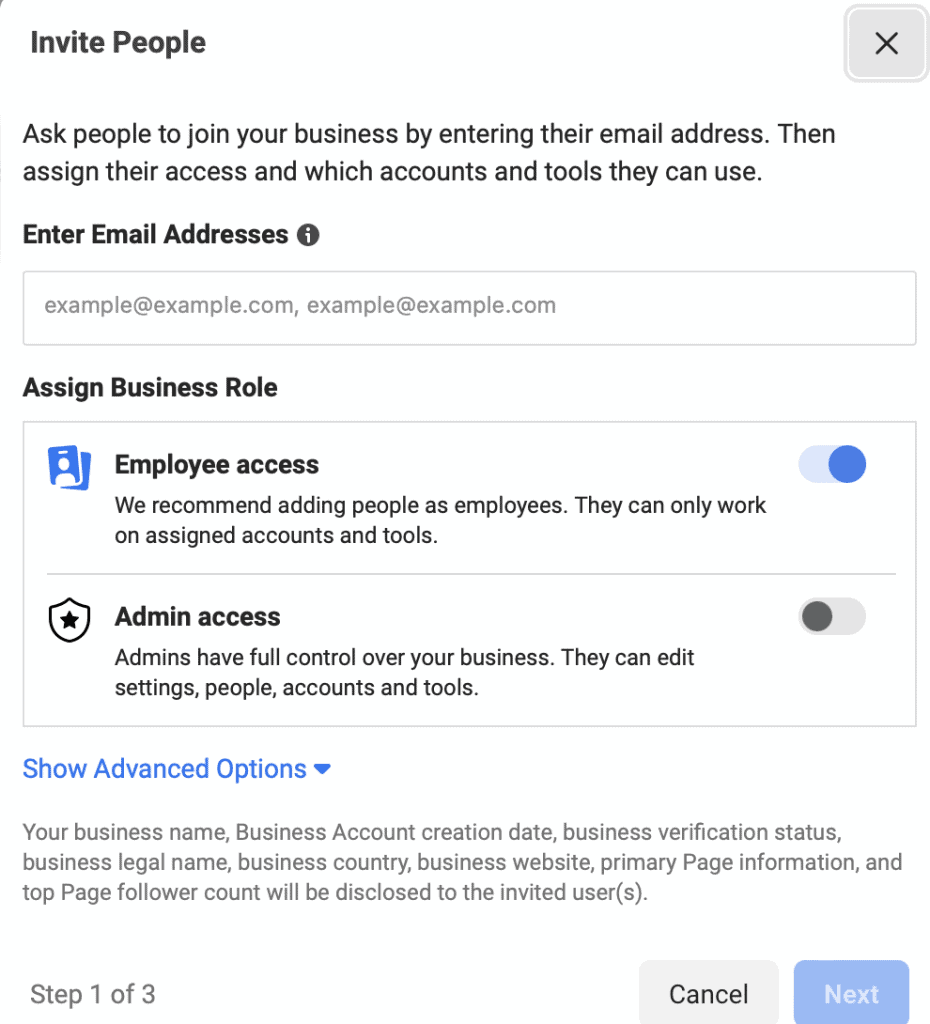
You can choose from employee access. This is recommended for adding individuals you just want to be working with particular tools on the account. You can also give them admin access, which will provide complete access to the Facebook Business Manager. Then click next.
Then you can choose which pages you want them to have access to and completely customize their access. Want them to just be able to publish content? No problem. Want them to manage jobs? Perfect!
Once you have the permissions you want to be selected for the page, you can go to an ad account and customize their permissions here. Once you have everything picked, you can click invite.
You can complete the process above until all your team members have been added. They will receive an invite email sent to their business email that you added to the page. They’ll need to go through the process for themselves with the link in the automated email.
From your side, you’ll be able to see your pending requests from your dashboard and know if someone hasn’t accepted the invite yet. If someone no longer works at your company or you want to remove them from the page, here’s how to do it:
- Go to business settings in the top right-hand corner
- Click people and click the name of the person you want to remove
- Simply click remove by hovering over the name and clicking the trash can icon
5. Partners and agencies
If you’re working with a partner or an agency for advertising, you’ll need to add them under partners.
Start at the business manager dashboard and go to business settings in the top right-hand corner.
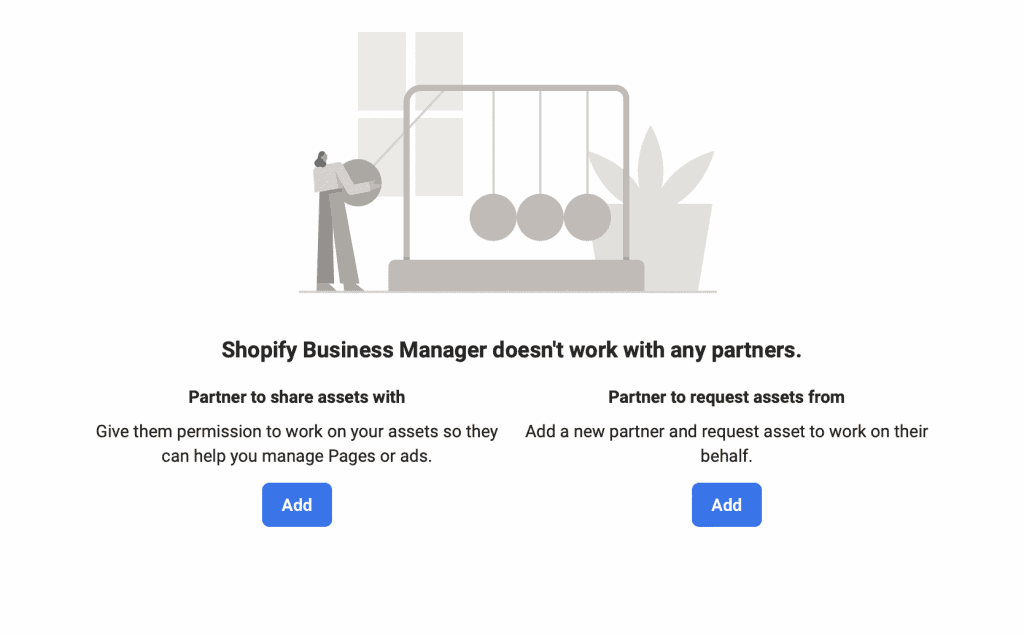
Under users, click partners. Two options will appear, click the one that says Partner to share access with, and click add
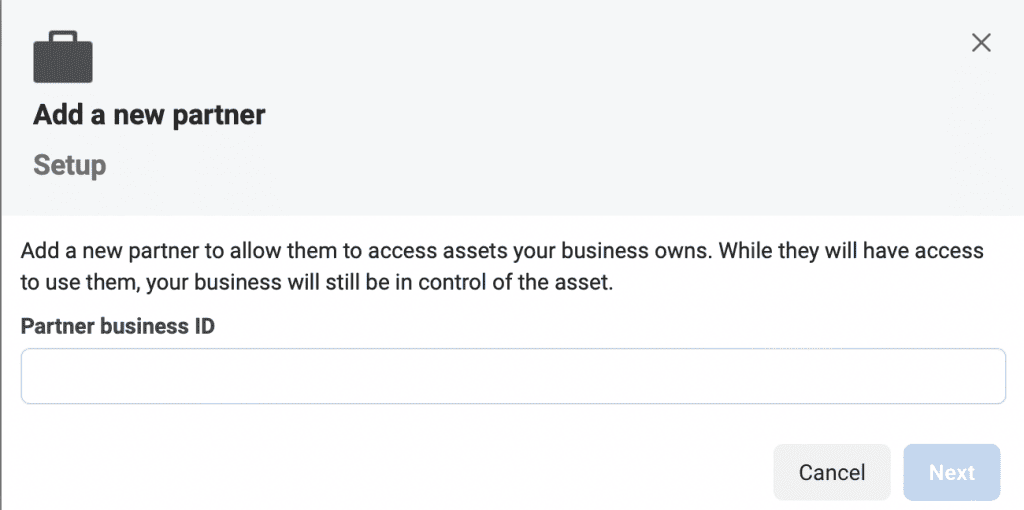
Connect with your partner and request their business manager ID. From your end, you’ll need to enter the ID and then click add.
Once your partner or agency has been added, they can take it from there. They’ll have all of the permissions to add their employees and manage your page on your behalf.
6. Connect to Instagram
At this point, all your Facebook assets and necessities are set up and ready to go, congrats! Now it’s time to get into the nitty-gritty things. If you have an Instagram account, you’ll want to connect it to your Facebook Business Manager as well. That way you can schedule content and keep track of performance.
Here’s how to get started:
- Start at the business manager dashboard, click business settings in the top right-hand corner
- On the left-hand side, click Instagram accounts and click add
- You’ll get a prompt to sign in to your account. Enter your login information and click log in
7. Set up your Facebook Pixel
Your Facebook Pixel attaches to your website. It helps you track conversions, build audiences, and optimize your Facebook ad strategy. The code is generated by Facebook and can be relatively easy to add to your website.
We don’t recommend skipping this step! The Facebook Pixel can be a beneficial tool you can utilize to enhance your Facebook performance and reach a larger audience with your Facebook ads.
To start, go to your Business Manager Dashboard and click business settings and then follow the steps below.

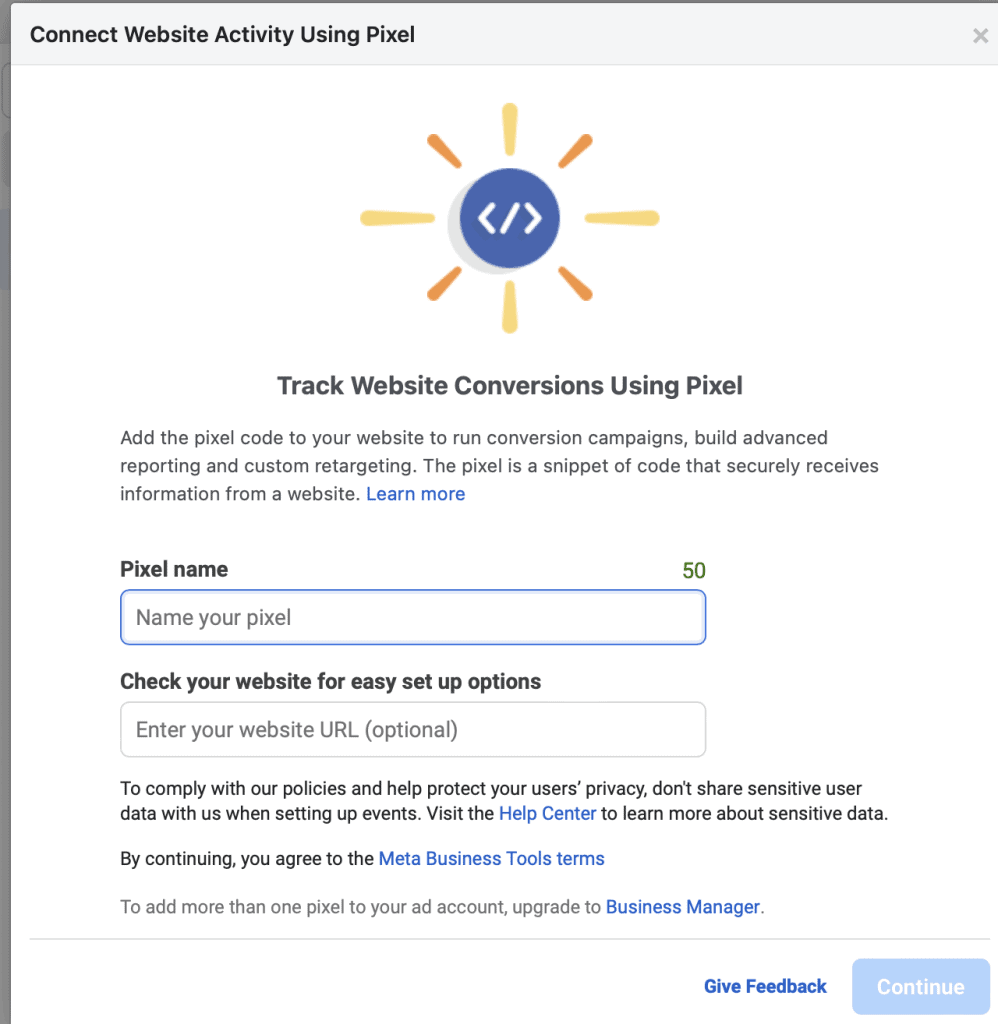
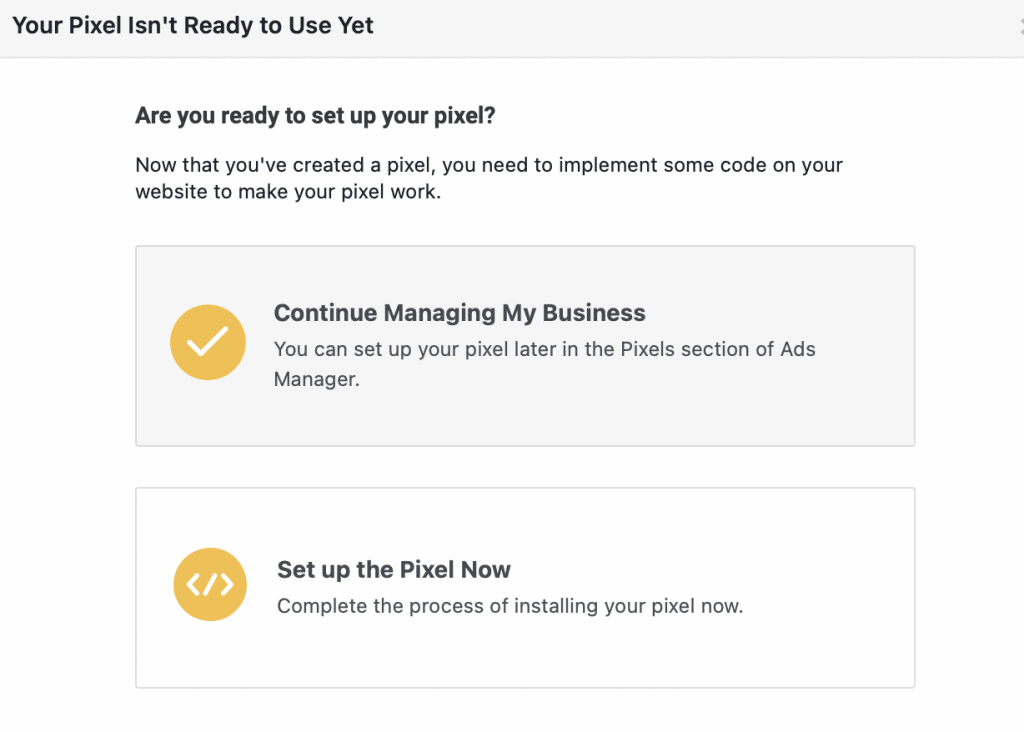
Facebook provides thorough instructions on how to install the Facebook pixel onto your webpage.
8. Set up two-factor authentication
Facebook Business Manager adds a layer of security to give business owners peace of mind. Here’s how to get them up:
- Go to the Business Manager dashboard and click business settings
- On the left-hand side, click security center

- Then set up two-factor authentication
Every individual with access to your business account needs to have two-factor authorization. From the business manager dashboard, you can see who has and hasn’t set up the two-factor, so you can reach out to them.
9. Creating a business asset group
Business asset groups can help you keep everything organized within your business manager. This is an important step for any company that wants to add more pages, ad accounts, or team members later.
Here’s how to do it:
- Start from the Facebook Business dashboard and go to business settings
- On the left side, go down to accounts, click business asset groups, and then click create business asset group.
- A pop-up will show up and ask how you would like to organize your work. You can pick from a separate line of business, different regions, agencies, or others. Then click confirm.
- Name the business asset group and click next.
- Choose which assets you want to include in this particular group. You can pick pages, ad accounts, or Instagram accounts and then click next.
Decide which team members will have access to this asset group and click create.
You’re done!
Once you have all of this complete, you can start taking your marketing initiatives to the next level.


